
How to build a sand sculpture - Tutorial Videos and Tips for beginners
Sand Sculpture tutorials: How many of us feel awesome when we dig our little toes into the wet beach sand. Artists like to explore new mediums every now and then and one of the beautiful art which just stays for a few hours are sand sculptures. The artists lay out detailed sculptures of amazing architecture, characters, surreal pictures or just about anything using just sand. It takes many hours for an artist to get his/her final sand sculpture in an open space. Many international sand sculpture contests are held near beaches and tons of wet sand is used for sculpting. It's an interesting profession for many. Sand sculpture artists are filled with a lot of patience since their work is tedious and time consuming. Even the slightest mistake can cause their great sculptures to fall. So precision, creative thinking and patience is most important for these artists. Some of the leading sand sculpture artists are Sudarshan Patnaik, Ray Villafane, Baldrick Buckle and so on. Some of the leading sand sculpture contests are: The Sun & Sea Festival Imperial Beach, SandSations Sandcastle Competition, International Sandsculpting Championship, Blue Water SandFest and so on.
Sand Sculpture Tutorial Videos
Amazing Sand Sculpture - 3D Art Sand Sculptures By Talented Street Artists
How to build a sand sculpture by Peter Redmond
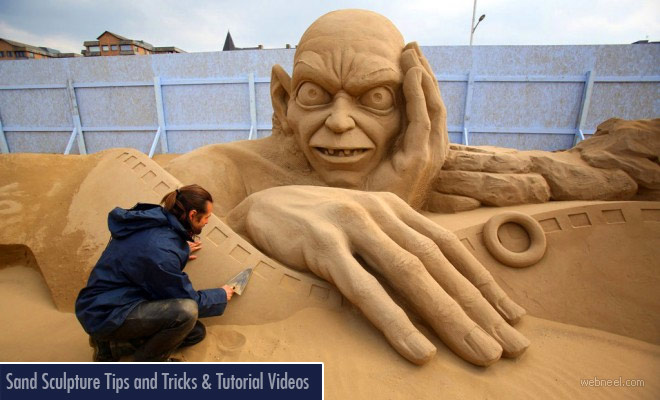
Sand Sculpture Festival Blankenberge 2012 by Alexander Deman
Amazing Sand Art - Incredibly Detailed Sand Sculptures by Barcroft
World Championship of Sand Sculpting by Rust Croft
Stop Motion Sand Sculpture by Leif Maginnis
Most Amazing Sand Sculptures by The Photo Collector
Time lapse Sand Sculpture by Pedro Mira
How To Create Sand Sculpture by Somjit Bhattacharyya
Sand Sculptures by Team Peck Dust
Sand Sculpture Tips and Tricks :
1. Saturated Sand : It's important to make the sand wet so it can hold it's shape. Pick up a lump of sand, squeeze and mold to get desired shape, if the sand starts to fall off, then you need to make the sand wet. Remember the sand should be able to hold it's shape.
2. Tighten the Sand : The wet sand has to be packed tightly, use molds to press it down or put some heavy objects on top of the sand to make them into the desired shape and thickness. Sand sculptors use tightly packed blocks of sand which resemble construction bricks.
3. Start from the Top : Sand Sculptures have to be started from the top most area, so it doesn't mess up your detailing in the bottom or the center. The outer compound or layer should be last thing you work on, else it will become a tedious process.
4. Patience : When you are dealing with a lot of sand, don't be in a hurry to finish your project. Remove small bits of sand at a time, so your detailings will be perfect. Remember it's not clay.
5. Start with a large pile sand : There is never too much sand for your creation, so make sure you have ample sand when you start on your sculpture, since we cannot add sand piles much later into your creation. Sculptors carve their creativity on to sand and remove the excess sand which doesn't fit in their creation.
6. Tools : Sand Sculptors need these basic tools: Brush, Manually Powered Pnuematic Sand Blaster, Straw, Large/Medium Detail Shaper, Bull Nosed Scraper, Smal Finishing Scraper, C Shell Scooper, Flat Knives, Buckets and Sand Wedge Hoe. Ofcourse you need a brush to dust of sand at unnecessary parts of your creation.